A little lowdown, Northeast, cigar-box Blues

Last June we took a four day road trip and headed north on I-95 aiming for Chester, CT. It was someone’s (ahem!) 50th Birthday and a get away was in order. We’re fairly familiar with the area having spent time over the years in Mystic, Essex and other parts along the coast there.

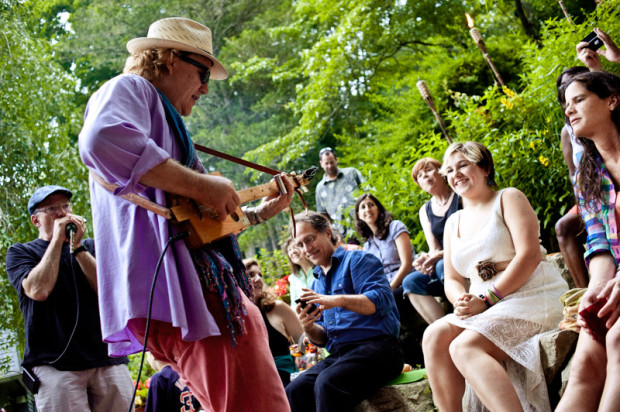
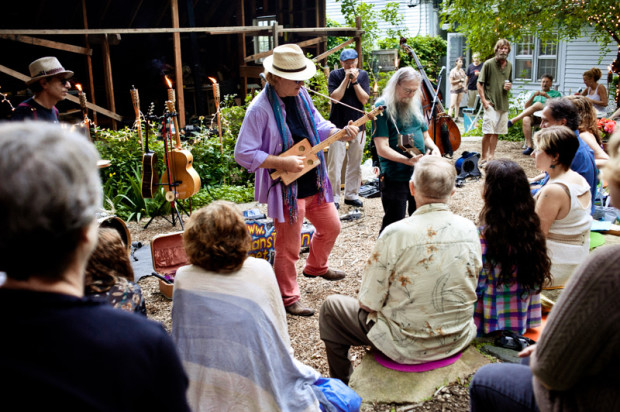
Every third Thursday from May to September the Nilsson Spring Street Gallery in Chester holds their Concerts In The Garden series. Music and the occasional play are enjoyed once a month by locals and sporadic vagabonds like us. The gardens are gorgeous, the amphitheater nice and intimate. It was a relatively cool evening the night we were there. Perfect for drinking beer (BYOB), eating pizza (homemade at the gallery) and listening to some blues.

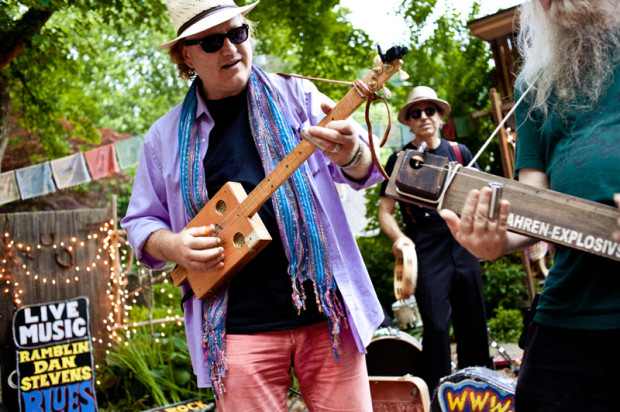
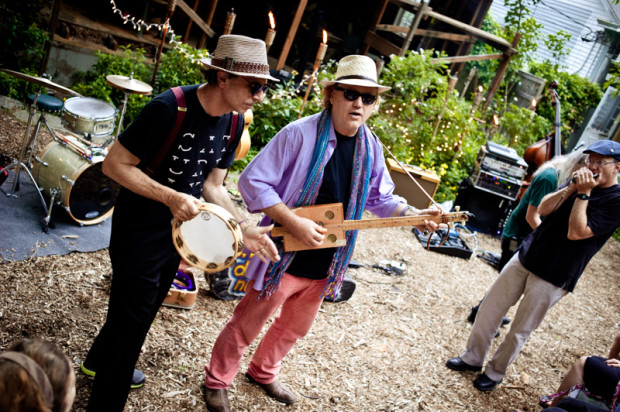
Ramblin’ Dan Stevens and his band gave us some downright righteous Americana that night. His rapport with the audience is comfortable and easy going. His blues guitar is straight up bad-ass, no doubt about it. He’s toured all over, bringing his take on traditional American blues to audiences in the U.S., Europe and even the Virgin Islands.

In addition to his six-string acoustic, he often pulls out his homemade axes: a three-string cigar box guitar and a one-string Diddly Bow. With these, and using what looks to be a 3/4″ socket, he’ll bore down deep into some slide guitar mojo that would make Duane Allman even crack a smile.

The new season at the Nilsson Gallery is soon upon us, and a return visit is likely. Until then, here are a few images from last year’s groovy show.

Ramblin' Dan Stevens, bluesman. Nilsson Gallery. Chester, CT.

Ramblin' Dan Stevens, bluesman. Nilsson Gallery. Chester, CT.

Ramblin' Dan Stevens, bluesman. Nilsson Gallery. Chester, CT.

Ramblin' Dan Stevens, bluesman. Nilsson Gallery. Chester, CT.


And by the way, the art in the gallery is by Leif Nilsson. Worth a visit all itself.
Photography at the Summit


william albert allard and david alan harvey at the summit series of workshops in jackson wyoming.

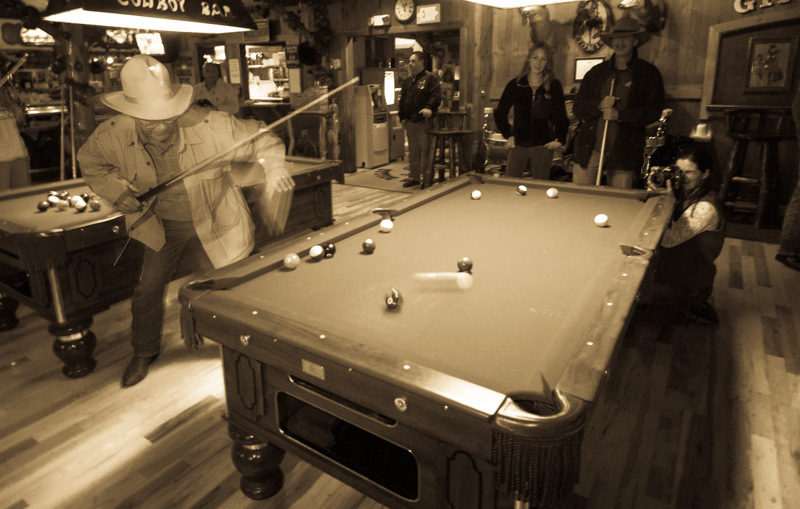
At the Cowboy Bar on Jackson’s main drag, Bill Allard gives a little extra body english
to his shot. David Alan Harvey and workshop attendees watch from the other end.

In 2006 I attended a workshop in Jackson, Wyoming. The Summit Series of Photography Workshops. It was an experience that will live with me forever. I met and learned from the likes of William Albert Allard, David Alan Harvey, Mary Ann Golon and James Hill. I met one of my best friends there, fellow attendee and now photojournalist Jeremy Wade Shockley.

It was a week of all out exploration. And not only the world of photography, but equally important, of our selves as well.

Early morning shooting, daily critiques, workflow and post processing classes, portfolio reviews. Every evening a lecture from one or two photographers and/or editors. Afterward, dinner and drinks at one of the local bars. These moments of unscripted, off the cuff, freewheeling conversations that arose when everyone was “off the clock” were some of the most important and enlightening. The refrain of the attendees quickly became, “Eh, we can sleep next week.” It was a nonstop buffet of photographic nourishment.

Rich Clarkson created this amazing workshop series. Here he explains his idea of Team Teaching and its benefits.

Workshop founder Rich Clarkson on Team Teaching from Summit Series of Workshops on Vimeo.

I will attest to the concept of team teaching. Getting such a comprehensive review of your work, receiving the wisdom of a variety of top notch professionals, each with vastly different experiences from their own photographic lives… these benefits just are not found in a one-on-one setting.

That one grueling week challenged me in so many ways. It tested my confidence and my abilities. And it pushed me to challenge myself. Clarkson and his team got me to consider new ideas and thought processes even before I look through the viewfinder. Ultimately, the workshop instilled in me a desire to be more than just a better photographer.

Oh, and hey, they’re running a contest right now. The winner receives free tuition to the workshop of his or her choosing! Go on over to their site and sign up.

Keep shooting.

-MK

Fuji X100S in Black & White

Found myself in the ever snowful Washington, DC the other day.

Thought I’d put the camera through it’s paces in B&W mode. Went with the Yellow filter effect. Not much post processing in Lightroom. Little contrast here and there and a couple needed lightening. Otherwise all just out of camera.

washington dc, lincoln memorial with tourists

silhouette of man at Lincoln Memorial taking a photo of Washington Monument. Washington DC

lincoln memorial interior, washington dc

woman walking out of Lincoln Memorial visitor Center

vendor showing off his stars and stripes

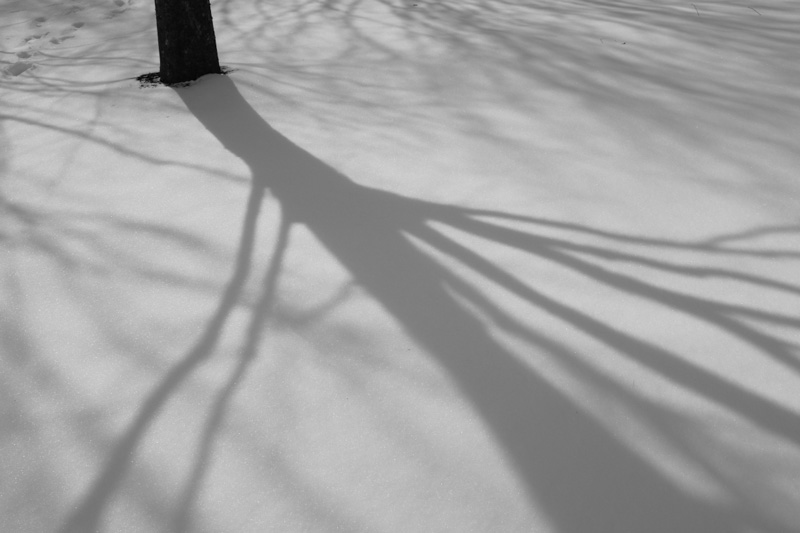
tree shadows on snow

seagull near Lincoln Memorial, washington dc

washington dc, c & o canal, cross country skis, man with dog

To filter or not to filter…

You never know when or where or why a discussion about lens filters will pop up, but one thing you can count on: Strong, long-held, unmovable opinions… for and against. “I would never put a cheap piece of glass between my high quality lens and my subject.” “You’re crazy not to take that extra step to protect your expensive high quality lens!”

When I first started out I was influenced by the “protect the lens” camp. It just made sense to take every precaution against damage to the front element of my lenses. I always used a lens hood, my lens cap (when I wasn’t losing it!) and always had a decent UV filter attached. Because, you just never know.

Later on I started to lean more towards the “nothing comes between my lens and my subject” camp. I saw big name photographers walking around with the most expensive glass in the world with no filter of any kind! Most of them were content to rely on the lens hood for protection. Up until fairly recently, I’ve remained in that camp. No cheap glass over my quality lens. I came to take for granted that if you put another piece of glass in front of the lens it’ll degrade the image, even if by just a small amount.

As mentioned above these conversations can manifest anytime, anyplace. As like the other day over at Burn Magazine. After reading a few comments, and being the scientifically minded person I am, I decided to do my own obvious experiment. Something, inexplicably, I’d never done before. Take two identical photos, under identical conditions and compare. (what a novel idea, I know!)

I made the photos. One filter on, one filter off. (BTW, I used a B+W UV filter) Brought the images into Lightroom, blew them up to 100% and… I could discern no difference. I toggled back and forth several times. First slowly then more quickly and there was just nothing that stood out. No degradation that I could tell with my own naked eyes.

When I first thought to make this post, I thought for sure I’d post the images so you the reader could download and do you’re own comparison. But now I honestly think it’s best that if you want to know for sure, if you really want to challenge your own current thinking, you should do you’re own experiment. It’s easy and costs nothing. Now, there are good quality and not so good quality filters out there. So that has to be a consideration.

Personally, I still think I’ll use filters sparingly. When on a job site (with lots of dirt) or at the beach with sand and salt blowing around, I’ll keep the UV filter attached. There is the issue of flare, but that’s easily seen when it’s happening and you can just remove the filter. Or, as some do, take advantage of it for effect.

The UV filter has its uses, for sure.

But if you decide go the route of the purists (no filter ever!) you’d be wise to at least use the lens hood, and if you can keep from losing it, your lens cap as well. Except when you’re shooting, of course. 🙂


Looking through a B+W UV filter.

A good quality UV filter? Not a bad idea.

Fuji X100S, 50mm teleconverter?

Just learned today {via Fuji Rumors} that a 50mm teleconverter is coming soon to a B&H warehouse near you! I expect many hope to be soon strolling city streets the world over, doing their best Cartier-Bresson impression, with a small bag packed with their X100S, a 28, 35 & 50mm kit. And hoping desperately a 90mm converter is not far behind. And why not? Sounds good to me!

This little beauty is Tamsyn. She is pure sweetness.

tamsyn.penberthy.02.27.2014-0001

I was able to briefly corner this little sprite near the kitchen cabinets.

The X100S kept up with her with no problem. Quite responsive, and wonderful files right out of camera. Yes, JPEGs. Film simulation was set to [Ns] Pro Neg Standard.

RAW + JPEG in Lightroom 5

A recent discussion with a photog friend sparked this post.

Ever wondered why you could never see your JPEG files after an import into Lightroom? I mean, you shot RAW + JPEG, right? You loaded the card with both the RAW files and the JPEG files into your card reader, right? And you imported the entire card, right? So where are those JPEGs?

Turns out it’s an easy fix. (At least from this point forward.) There is a toggle to check in Preferences, but by default Lightroom leaves it unchecked.

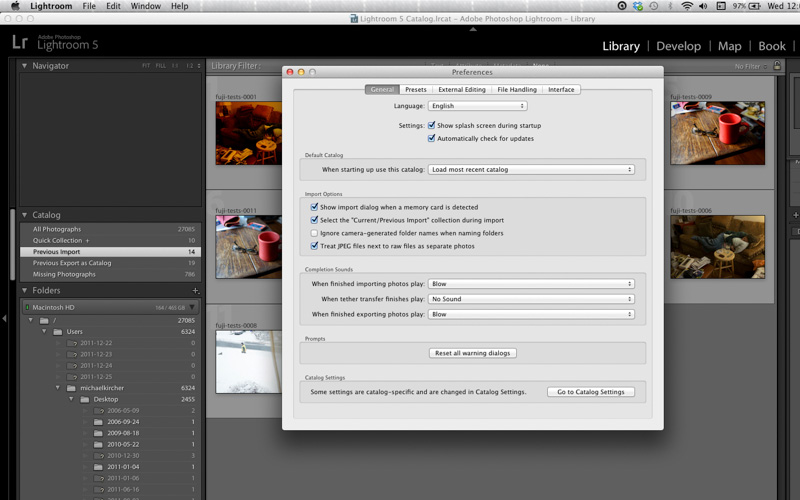
When you’re in Lightroom, up in the left hand corner, click on the word “Lightroom”, then click Preferences; on the  General settings page you should see Import Options, under that is “Treat JPEG files next to RAW files as separate photos.” Check that box. You’re done. (Screenshot below:)

Now, should you do this? Well if you have a ton of space on your HD and you truly feel a need for it, meaning you can shoot quality JPEGs and plan to do minimal post production but want the RAW file just in case, then sure. But I can’t see doing that too often. For me, I’d rather shoot one or the other. Most often RAW, of course. But there are occasions where I’ll shoot straight JPEGs and be done with it.

In the end it’s a personal choice. If I’ve missed a truly compelling reason to always shoot RAW+JPEG, please let me know in comments.

Cheers.

raw + jpeg tutorial for lightroom users

RAW + JPEG in Lightroom